

Weed Management on Small Acreage in Montana
Managing plant communities on your property can be both challenging and rewarding. This handbook was designed to help landowners manage their land, with a special focus on preventing and controlling invasive weeds. Following the guidelines in this booklet will help you successfully manage plant communities and achieve your land use goals. This booklet provides the foundation for developing a weed management plan by explaining basic concepts and practices of vegetation management. The resources section located at the back of this publication contains references to many resources, including publications, websites, and contact information for weed management expertise.
Last Updated: 05/18by Montana Noxious Weed Education Campaign
Photo credit: Karen Laitala, Powell County


ADVISORY COMMITTEE:
This publication was produced by the Montana Noxious Weed Education Campaign with suggestions from:
Dave Brink Mineral County MSU Extension, Superior
Dave Burch Montana Department of Agriculture, Helena
Celestine Duncan Weed Management Services, Helena
Shantell Frame-Martin Montana Noxious Weed Education Campaign, Bozeman
Melissa Maggio-Kassner Montana Biological Control Program, Missoula
Jane Mangold Montana State University, Bozeman
Dave Martin Montana DNRC, Helena
Steffany Rogge-Kindseth Missoula County Weed District, Missoula
LAYOUT & DESIGN
This publication was revised and updated in 2018 from the original publication titled, TIPS for Fighting Weeds on Small Acreages in Montana, printed in 2007 by the Montana Department of Natural Resources and Conservation Service, Helena, Montana. Design and layout by MSU Extension Publications.
FUNDING
Funding was provided by the Montana Department of Transportation, USDOI-Montana/Dakotas Bureau of Land Management, USDA-Forest Service Region 1, Montana Department of Natural Resources and Conservation, and the Montana Weed Control Association.
All photos and graphics are property of MNWEC or other contributors as listed and cannot be reprinted or used without written consent.
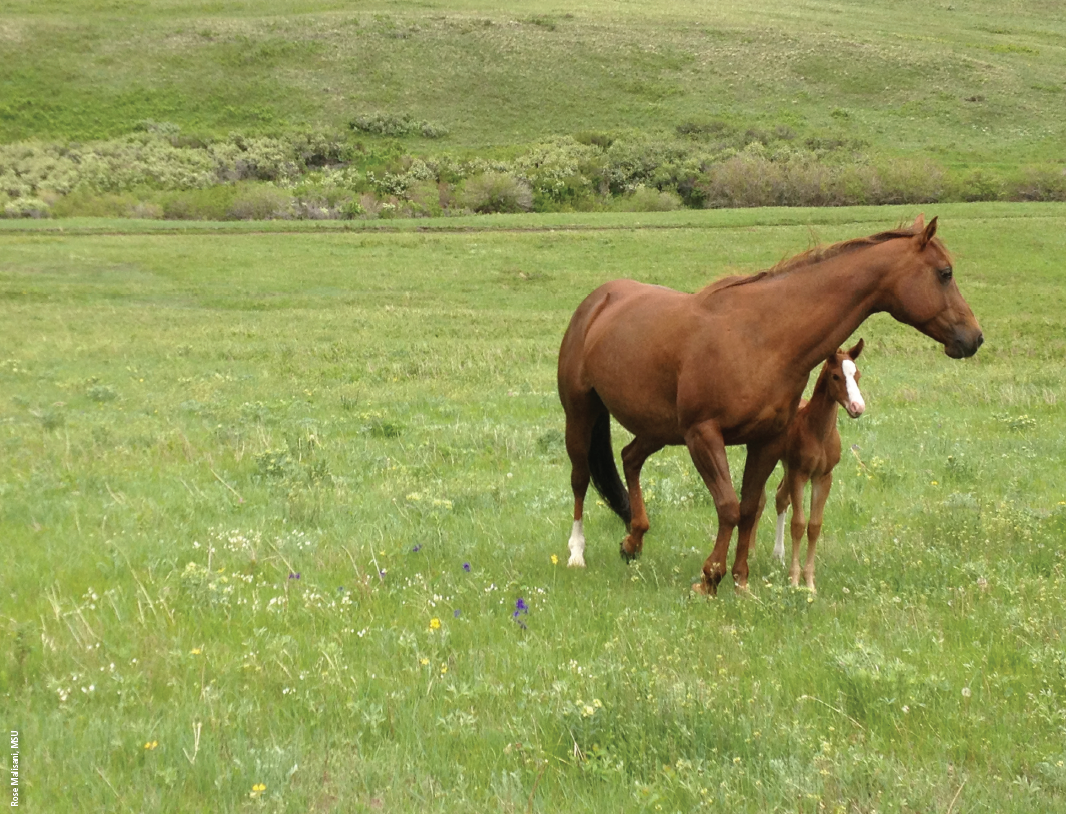
Proper grazing management and the use of noxious-weed-seed-free forage for supplemental feeding is important for healthy, weed-free pastures. Photo credit: Rose Malisani, MSU
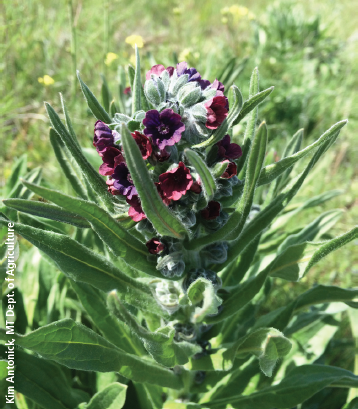
Houndstongue is a Montana state-listed noxious weed that produces bur-like seeds. Photo credit: Kim Antonick, MT Dept. of Agriculture
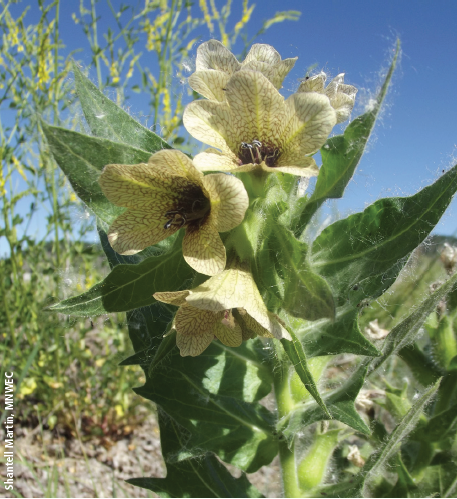
In addition to state-listed noxious weeds, counties may also have plants that are of concern in their area. Black henbane is listed as a county noxious weed in several counties across Montana. Photo credit: Shantell Martin, MNWEC
What is the difference between a weed and a noxious weed?
A weed can be defined as a plant growing where it isn’t wanted, for example a dandelion growing in your lawn. Noxious weeds are non-native plants that cause injury to livestock, agriculture and/or the environment, and were introduced to North America from another region or continent. Most noxious weeds are also invasive, which means they are capable of establishing and spreading to new habitats and may displace desired plants. A plant is declared “noxious” by the Montana Department of Agriculture. The Montana County Noxious Weed Control Act mandates that land owners manage noxious weeds on their property. To find out more about how a plant is declared noxious in Montana and for a list of plants on Montana’s Noxious Weed list visit: agr.mt.gov/Weeds.
In addition to state-listed noxious weeds, counties may also list species that are particularly problematic in more localized areas. Contact your local county weed coordinator or Extension agent to check for county-listed species.
Some noxious weeds were brought to North America intentionally for their medicinal and ornamental traits. Others were introduced accidentally as contaminants of crop seed, livestock feed, straw, or packaging materials. Disturbances in plant communities and soil associated with westward expansion and land use change made landscapes more susceptible to invasion by non-native, invasive plants.
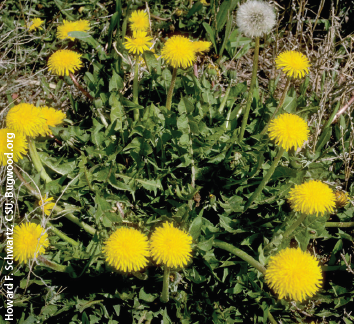
Plants such as dandelions are considered a nuisance weed and are not listed on Montana's noxious weed list. Photo credit: Howard F. Schwartz, CSU, Bugwood.org
Montana County Noxious Weed Control Act
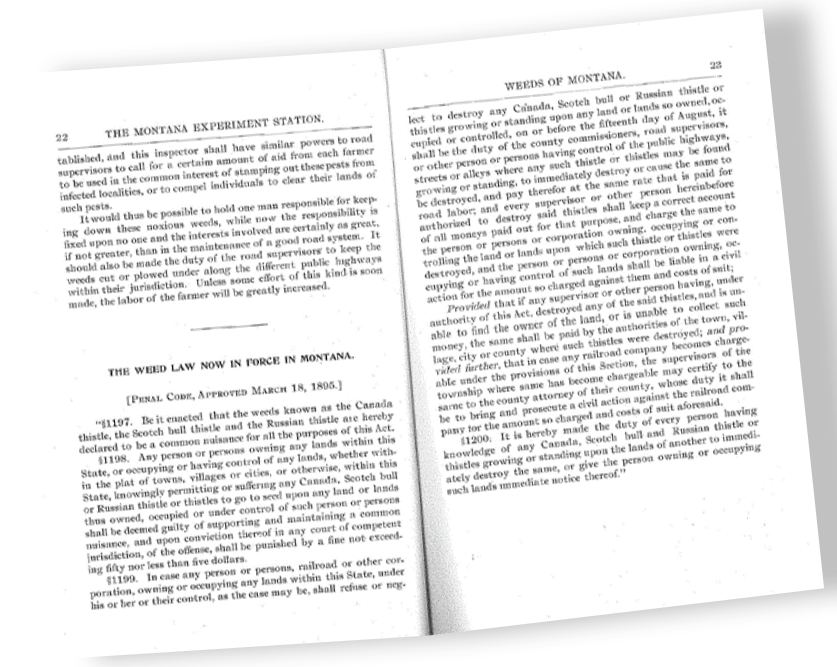
Montana has a long history of being proactive when it comes to weed management. The first weed law in Montana was enacted in 1895, the weed law that is enforced in counties presently is the “Montana County Noxious Weed Control Act,” which was signed by the Montana Legislature in 1948. This law states that, “It is unlawful for any person to permit any noxious weed to propagate or go to seed on the person’s land, except that any person who adheres to the noxious weed management program of the person’s weed management district or who has entered into and is in compliance with a noxious weed management agreement is considered to be in compliance with this section” (MCA 7-22-2116).
The Montana County Noxious Weed Control Act paved the way for additional legislation that protects the state from invasion of weeds. The Montana Noxious Weed Seed Free Forage Act was passed in 1995 because Montana’s legislators realized that the natural resources of the state needed to be protected from noxious weeds and their seeds. The Department of Agriculture administers the Noxious Weed Seed Free Forage (NWSFF) program, which required people to use certified noxious weed seed free hay, straw, pellets, and cubes while on public lands to stop the spread of noxious weeds to the backcountry. People are also encouraged to feed their horses, mules, or pack animals certified forage for at least three days before riding on public lands. Small acreage landowners who buy feed for their livestock should feed NWSFF to prevent introduction of new noxious weeds onto their property. In addition, the Montana Environmental Policy Act, the Montana Agricultural Seed Act and the Commercial Feed Act all mention noxious weeds. Each of these laws help to prevent or reduce the spread and/or introduction of weeds into Montana.
Certified noxious weed seed free products can be found across Montana and are marked with special blue and orange twine or red tags on baled certified forage, or orange labels on bagged, processed feed. To find the nearest producer of hay, straw, pellets, or cubes, visit: agr.mt.gov/Noxious-Weed-Seed-Free-Forage.
Why Worry About Weeds?
Weeds crowd out more desirable plants in lawns, gardens, croplands, pastures, and natural areas. Infestations can reduce crop yield and available livestock forage, causing economic hardships for farmers and ranchers. Weeds diminish wildlife habitat, decrease property values, and can lead to soil erosion. Some species are poisonous and can sicken or be fatal if ingested by pets, livestock, or people.
Weeds also impact outdoor recreational activities. For example, infestations of spotted knapweed can reduce desirable grasses on elk winter range by up to 90%, affecting hunting opportunities.
Humans are the number one means by which weeds spread! If you hike, bike, hunt, fish, ride a horse, go camping or ride an ATV anywhere, you should arrive at your destination with clean gear. It is important to wash tires, undercarriages, wheel wells and running boards to help reduce the possibility of transporting weed seeds in the mud that collects in these places. If you use horses or other animal companions for recreation, you should remove mud and weed seeds from fur, hair and hooves. The use of certified noxious weed seed free forage (NWSFF) products three days before going on to and during your time on public lands will help reduce the spread of weed seeds through contaminated forage products. If you always PlayCleanGo (PCG®), you’ll be doing your part to help stop invasive species in YOUR tracks! To learn more about PCG®, visit: playcleango.org.
Similarly, curlyleaf pondweed and Eurasian watermilfoil impact fisheries and make water recreation (swimming, water skiing, boating) difficult due to extensive mats of floating plant material on the surface of ponds and lakes.
Once established, the costs associated with weed management are a large and long-term investment. For example, the cost of weed management can range from $10 to $350 or more per acre, depending on the location of the weed and type of management method used. In many cases, long-term management over many years is needed to effectively contain and control an established infestation.
Weeds are highly competitive and thrive where soils have been disturbed and plants are unhealthy due to recent or reoccurring disturbance. A plant community can be considered “unhealthy” when constant disturbances occur that lead to degradation of the site including erosion, reduced plant growth, reduction in species diversity and changes in soil such as compaction.
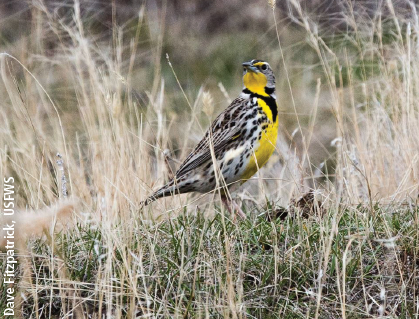
Improving habitat for wildlife such as birds is a great land use goal. Wild bird species such as the Western Meadowlark depend on healthy, diverse habitats. Photo credit: Dave Fitzpatrick, USFWS
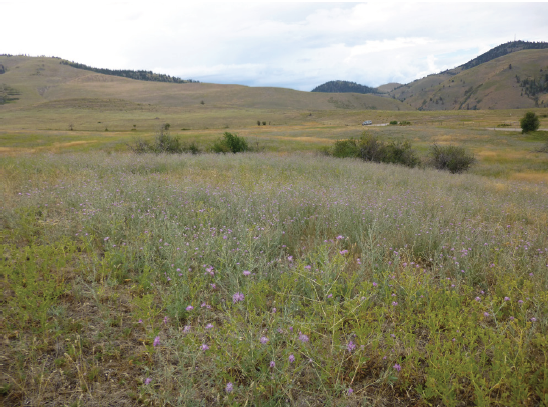
Spotted knapweed infestations cause a monoculture, which means that little to nothing else grows there besides spotted knapweed. Infestations like this are an example of a very unhealthy plant community because of the lack of species diversity. Photo credit: Jane Mangold, MSU
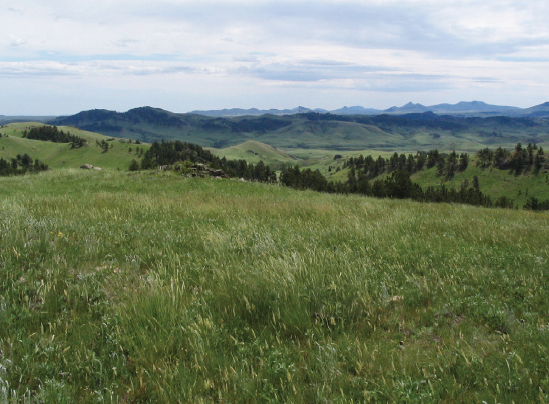
A healthy plant community features many types of plants that together have the capability to ward off infestations of noxious weeds. Photo credit: Jane Mangold, MSU
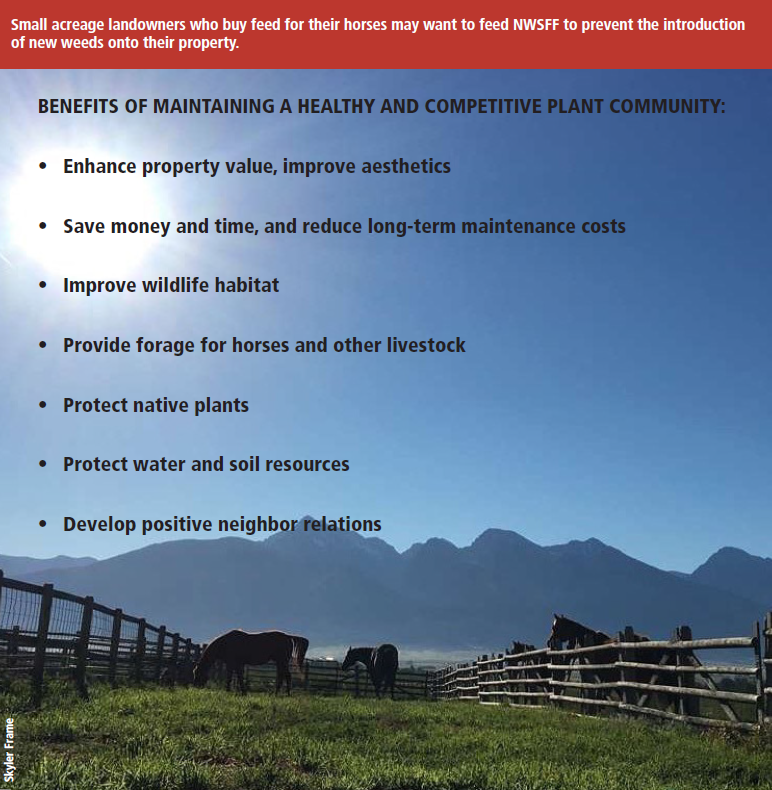
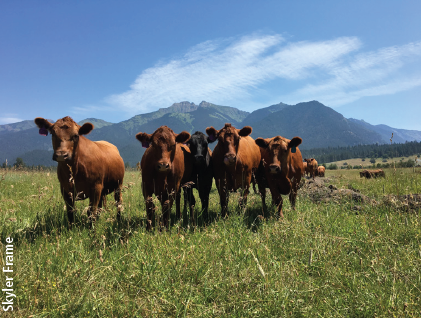
Photo credit: Skyler Frame
Unhealthy plant communities can be caused by overgrazing, logging, new construction (including building of structures, roads, railway, and utility lines), and off-road trail use, as well as natural causes such as fire and flooding. One of the key things to remember about “healthy” versus “unhealthy” plant communities is competition. A healthy plant community is better suited to compete with an impeding weed infestation, whereas an unhealthy plant community is not because of the lack of diversity and poor health of the plants located in the community.
A “healthy” plant community is naturally the opposite of what an unhealthy plant community is; there is diversity of species, plants are actively growing, little to no erosion occurs and the soil is providing nutrients and water to benefit the plant community. A healthy plant community wards off weed invasion because it is competitive. To help prevent weeds from invading, nurture and encourage competitive, healthy plant communities.
Common land use goals include livestock grazing, raising hay, or improving native plant communities to increase wildlife or pollinator habitat. Photo credit: Kim Antonick, MT Dept. of Agriculture
Getting Started
The first step to successfully managing weeds on your property is to define what you wish to do with your land. Photo credit: Skyler Frame
The first step to successfully managing weeds on your property is to define what you wish to do with your land. In other words, develop realistic land use goals that align with your property’s potential. If you graze too many animals on too few acres or repeatedly disturb plants and soils through other means, you will likely have weeds. Some common land use goals include livestock grazing, raising hay, or improving native plant communities to increase wildlife or pollinator habitat.
The second step is to identify any weeds that are growing on the property and interfering with land use goals. Familiarizing yourself with plants growing on your land will enable you to develop an inventory of desired and undesired plants, assess plant types and determine control methods for those you do not want, e.g. weeds. A detailed inventory will help you achieve land use goals by serving as a reference point in monitoring management progress. Once you know what is growing on your land, you can begin to promote healthy plant communities, which is a major component to effective weed management and a benchmark of good land stewardship.
The third step is to implement good land use practices. Good land use practices include seeding or revegetating any disturbed areas associated with new construction, road ditches, water lines, etc.; using Certified Noxious Weed Seed Free Forage (NWSFF) to feed livestock; grazing an appropriate number of livestock; and managing weed infestations while they are small. Another component of good land use is to choose the right weed control method or combination of methods that will maximize your efforts. Combining multiple weed control methods is called “Integrated Weed Management” or IWM. There are numerous factors to consider when determining what types of control methods will be effective for use in your situation. Chemical, mechanical, biological and grazing are all very effective management methods; when used in conjunction with one another, these tools can be even more successful.
The fourth step is to monitor your progress and adjust management methods over time as necessary. It is important to remember that no weed control method works alone; IWM will help to achieve your land use goals so that you may fully enjoy your property now and in the future.
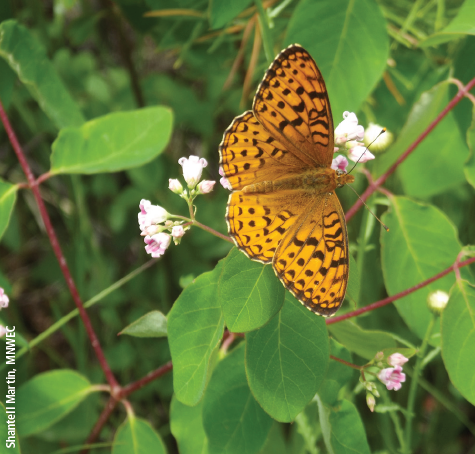
Meadow fritillary (Boloria bellona). Photo credit: Shantell Martin, MNWEC
For the most up-to-date state noxious weed list and weed identification videos, visit: http://agr.mt.gov/Weeds
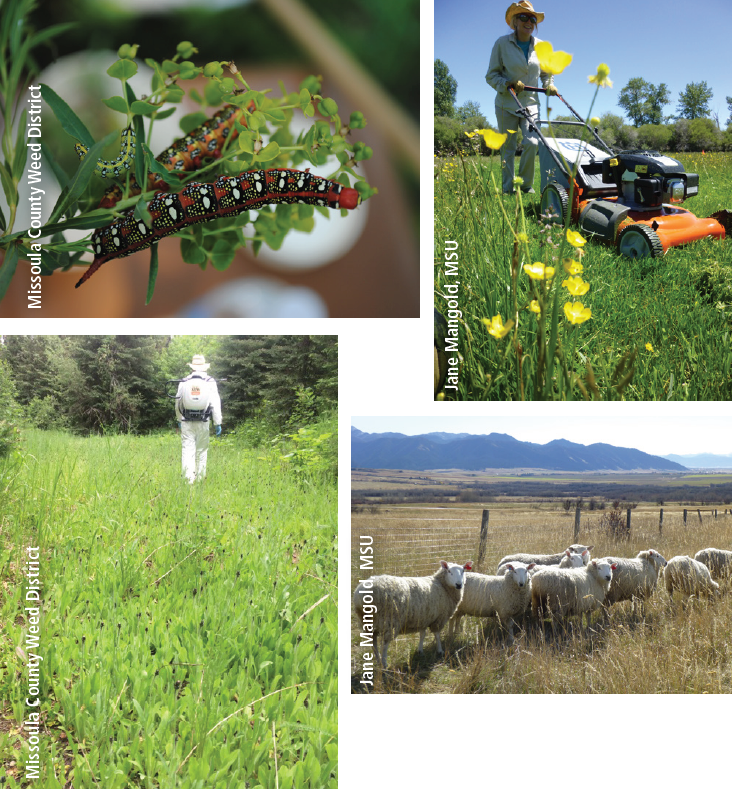
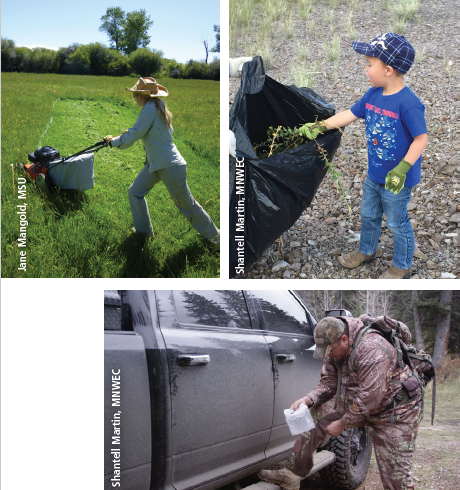
Integrated Weed Management or IWM is combining multiple methods of weed control to maximize efforts. Photo credits: top left and bottom left: Missoula County Weed District. Top and bottom right: Jane Mangold, MSU.
4 Principles of Weed Management:
- Know what you want to do with your land (define land use goals).
- Identify weeds growing on your land.
- Choose the right method(s)/tool(s) to reduce weeds and implement good land use practices.
- Monitor your progress and adjust your methods over time.
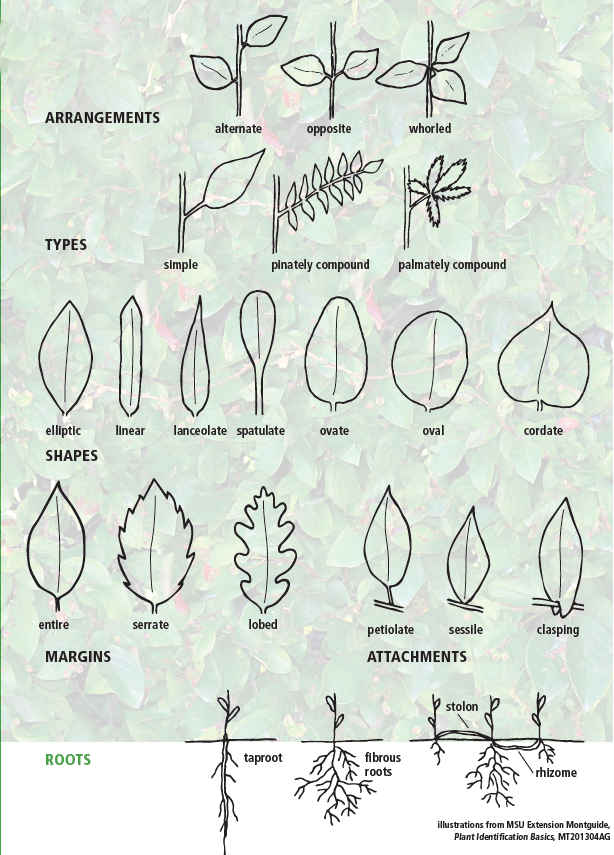
Plant/Weed Identification
The lifecycle of a plant is how a plant moves from being a seed to an adult plant capable of reproducing. Lifecycles can affect overall plant productivity as well as how the weed can be best controlled.
NOTE DISTINGUISHING CHARACTERISTICS OF A PLANT
- Leaves: location on stem, shape, texture and size.
- Stem: shape, thorns, fuzzy or smooth, single stem or vine.
- Height: size and overall shape of the plant.
- Flower: color, petal shape, and whether there are multiple blossoms or just one.
- Seeds: shape, size, color, barbed, hooked, spines.
- Roots: Roots are generally divided into two types, taproots and rhizomatous. Taproots have a strongly developed main root that extends vertically into the ground, like a carrot, with smaller lateral roots growing from the main root. Rhizomatous roots spread vertically and horizontally, exhibiting a creeping appearance.
Need Help Identifying a Plant?
If you cannot identify a plant and you fear it may be a weed, dig up three or four samples of the plant, bag them in a sealed plastic bag and take them to your local Extension office or county weed coordinator within 24 hours of collecting. If your local experts cannot identify the plant, they will send the specimen to the Schutter Diagnostic Lab at Montana State University for identification. Sometimes the unknown plant can be identified through photos. If you are unsure about digging up a plant, take photos first and share with local experts.
Take an inventory of weeds growing on your land by drawing a map of your property and noting areas where weed infestations are located. To begin, make note of areas where weeds are growing, areas of bare or disturbed soil, and areas where desirable plants, such as grasses and shrubs are thriving. This map may seem basic, but it is an essential first step to help you better understand where weed infestations occur and to determine the size of infestation(s). This map will serve as a reference point that you can use year after year to help determine if management methods are working. If you would like a more technical way to track and report the species that occur on your property you may use an app called EDDMapS. For more information about EDDMapS, visit: https://www.eddmaps.org/.
PLANT IDENTIFICATION BASICS
What a Weed Inventory Tells You
Once your inventory map is complete, you may see that different areas of your property have plant communities that are in various states of health. Use this information to determine how to treat the weeds in each area. Areas with disturbed ground from construction activities or along roads are one of the first areas weeds will invade. These areas usually need immediate and constant attention.
Recognizing the growth stage of plants and their lifecycle is essential to successful weed management.

Draw a simple map of your property, indicating where weeds and other vegetation occurs. Photo credit: MT DNRC
Bare ground may or may not indicate a problem; much of Montana is an arid or semi-arid environment where bare ground can occur naturally. If the bare ground is due to natural causes, it may not be prone to weeds. However, bare ground caused from human actions, such as overgrazing, construction, logging or fire (human- or natural-caused), can lead to soil erosion or weed invasion if left unaddressed.
Once you have your inventory complete and have questions on how to determine a treatment plan for the property, contact your local Extension or county weed district office for assistance. Your local weed experts can help identify any unknown plants you may have encountered with inventorying, formulate an integrated weed management (IWM) plan, and make treatment recommendations for specific weeds based on your land use goals.
Bare ground may occur on healthy land, however bare ground caused by disturbance opens the land up for invasion of weeds. Photo credit: MT DNRC
Basic plant life cycles:
- Annual: completes lifecycle in 1 year (grows from seed, flowers, produces seed, and dies).
- Biennial: completes lifecycle in 2 years (grows from seed and remains vegetative the first year, produces seed the second year, and dies).
- Perennial: lives for more than 2 years, usually flowers and produces seeds every year
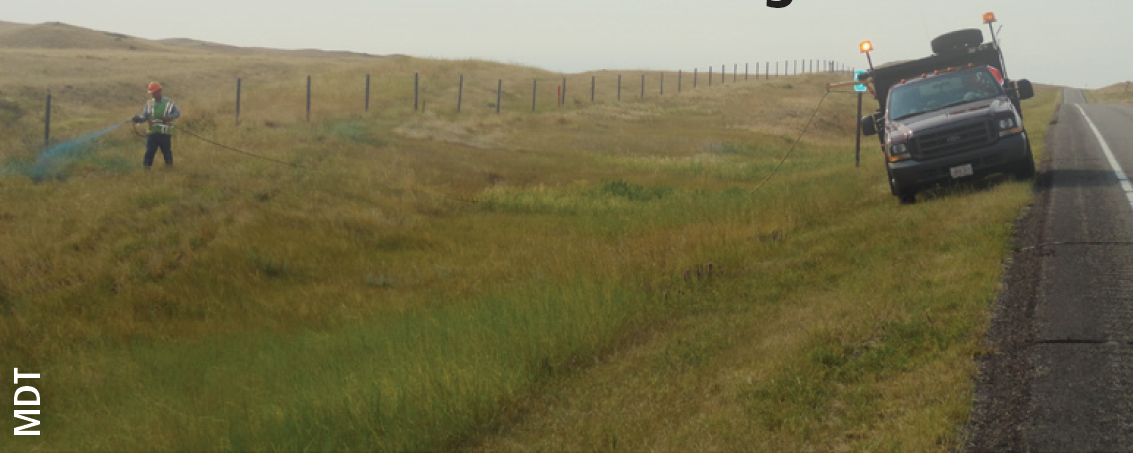
RIGHTS-OF-WAY and ROADSIDE INFORMATION
In Montana, weed control along public roads and rights-of-way is the responsibility of the agency tasked with maintaining those roads. Private landowners may enter into an agreement with those agencies that allows them to manage weeds along rights-of-way that border or bisect their property, which may be of interest to you if you do not want herbicides sprayed adjacent to your fields, flowers, or gardens. Such an agreement must be approved by the local county weed board and the Montana Department of Transportation if the right-of-way is maintained by the state. Failure to adequately control weeds through such an agreement will result in notice by the weed board, reversion of weed control responsibility to the agency in charge, and possibly further misdemeanor charges.
A person spraying a ditch along side a paved road. Photo credit: MDT
Integrated Weed Management (IWM)
Controlling weeds can seem like an impossible chore, but with the right mindset and tools you can attain land use goals by implementing integrated weed management (IWM).
Prevention
The old phrase, “An ounce of prevention is worth a pound of cure” is especially true when dealing with weeds. If you prevent new weeds from being introduced to your property, you are saving yourself both time and money in the long run. It is a good idea to survey and inventory what is growing on your property to find weeds early, as it is easier to control small infestations rather than larger, more established populations. Weeds spread to new areas in a variety of ways; some have specialized barbs, hooks or appendages on their seeds which make them attach easily to animals, people and vehicles. Always remember to wash vehicles and equipment after driving or working in weed-infested areas. Reduce human-caused opportunities for weeds to spread by being educated about exotic plants that have invasive characteristics such as the ability to sprout from cuttings, roots and “dormant” seeds, and the adaptation to emerge rapidly after fire or soil disturbance. These characteristics give weeds a competitive advantage over native plants when people disturb the land and native plant communities. Some of Montana’s weeds got their start as ornamental plants so it is important to choose native species for landscaping (or at least avoid species that show invasive characteristics), don’t overgraze or disturb plant communities, use weed-seed-free products (forage, straw, seed, gravel and other fill materials), and always be aware of what is growing on your property. If you know what you have and what you do not want, then you can work toward your land use goals.
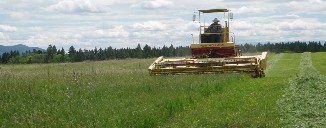
Mechanical (Mowing and Hand-Pulling)
Mowing and hand-pulling are two techniques that stress weeds and give healthy communities a chance to out-compete weeds for essential resources such as water and nutrients. These methods also reduce weeds by eliminating, or at least reducing, seed production. Mowing removes plant parts that occur above ground, which is where plants produce food (i.e. sugars) that are stored in the roots. Hand-pulling removes plant parts above ground and if done correctly, also belowground parts of the plant (i.e. roots). Removing leaves and/or roots interrupts food production and weakens the weed.
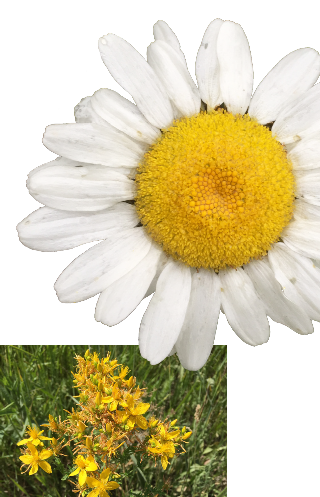
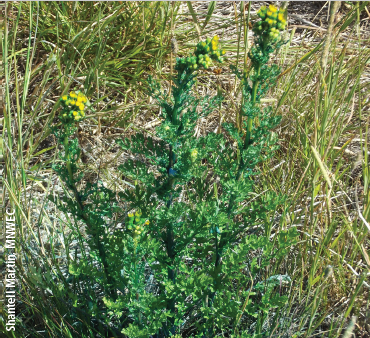
Oxeye daisy (top), often mistaken for a wildflower, isactually a state listed noxious weed in Montana. St. Johnswort, (below), was intentionally introduced into North America for its use in medicinal folk remedies. Photos by Shantell Martin, MNWEC
Mowing can be an effective control method if used consistently with other tools. Dispose of seeds found in a trash receptacle. Always make sure to bag any weeds pulled to eliminate further seed spread. To avoid bringing new noxious weeds home, always clean your gear to remove weed seeds after recreating. Photo credits: top left: Jane Mangold, MSU. top right and bottom: Shantell Martin, MNWEC.
Most deep-rooted perennial weeds cannot be controlled by mowing or hand-pulling. Therefore, it is important to know how your target weed will respond to these techniques. Weeds are highly competitive, and one treatment will not usually kill them. Although, when combined with other weed management tools and promoting healthy plant communities through good land use practices, desirable plants can replace weeds over time.
MOWING
Depending on the target weed, mowing can be effective if used consistently and with other tools. Mowing frequency is determined by the general climate and growing seasons in your area and can take place in spring, summer and fall. You may have to adjust for annual changes such as an early spring, a wet summer, or drought; each year will be different.
The best time to mow weeds that reproduce by seed only is just before the weeds start to flower. Each weed flowers at a different time, usually in late spring or early summer depending on your local growing season. Mowing before weeds flower reduces seed production. If you mow too early and repeatedly, though, some like spotted knapweed grow low to the ground but still flower and produce seeds. For weeds that reproduce both by seed and vegetatively through rhizomatous roots like Canada thistle, mowing should be done frequently to stress the roots throughout the growing season. Consult your county Extension agent or weed coordinator if you are not sure of the best time to mow.
After revegetation, mowing in the first year removes fast-growing annual weeds before they flower and produce seed. Set mowing height above height of seeded species, if possible.
Before spraying herbicides in the fall, mowing removes dead stems and leaves to allow for better herbicide contact with the remaining weeds. To be most effective, there needs to be some fall regrowth or green material left on the plant.
If you are not grazing animals, mow grass stands approximately every three years, wherever possible, to stimulate healthy plant growth. Excessive mowing can weaken native bunchgrasses, so do not mow too often.
Mowing and hand-pulling:
- should be strategically timed to stop seed production and remove seed sources,
- must be combined with good land use practices,
- may be used in conjunction with other weed control methods, and
- are excellent alternatives for sensitive areas, such as near water (wellheads or streams) or sensitive plants where herbicide application is not advised.
HAND-PULLING
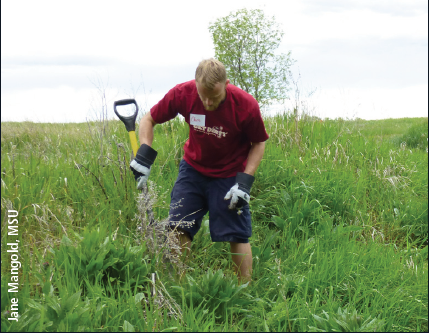
Hand pulling can be an effective method to remove noxious weeds. You can also use tools such as a shovel. Photo credit: Jane Mangold, MSU
Ideally, hand-pulling removes both aboveground and belowground portions of the plant and the roots. Hand-pulling works well for weeds with taproots, such as knapweed and houndstongue. Other weeds, such as leafy spurge and Canada thistle, have spreading underground roots (rhizomes). These can re-sprout and quickly recover from hand-pulling. In such cases, hand- pulling should be combined with other control methods. However, there are exceptions to this and it’s best to check with your local Extension agent or county weed coordinator to make sure that hand-pulling will be an effective method of control for the weeds on your property.
WHERE TO PULL
Pulling is most effective for small patches of weeds (less than 1 acre), to prevent new infestations, and as a follow-up to other treatments. Pulling is effective on land not suited to herbicide applications such as around wellheads, streams, and sensitive plants.
TIMING
The best time to pull is when the ground is moist in the spring or after rain or irrigation.
Pulling should be repeated a minimum of every 10 to 20 days throughout the growing season (usually May through October).
HOW TO PULL
Grasp the plant firmly near the base. Pull the weed from the ground, trying to disturb as little soil as possible. You may need to use a shovel or other tool to pry out tap-rooted weeds.
Weeds that are flowering should be pulled and placed in a plastic bag to reduce the spread of seeds. Dispose of them in a trash container or incinerate.
Chemical (Herbicides)
Spraying can be an effective way to remove noxious weeds. Photo credit: MT DNRC
Herbicides are an effective management tool for weeds when used properly. An effective long-term strategy incorporates other IWM tools in addition to herbicides, e.g. hand-pulling small patches in addition to spraying larger patches. Once you have identified herbicides as a component of your overall weed management program, you need to consider the following:
- herbicide selection,
- where and when to apply,
- sprayer calibration,
- mixing and handling,
- clean-up, disposal, and storage of herbicides.
Herbicides are designed to be toxic to plants. When handled correctly, there is little toxicity risk to humans and animals. The label provides information about how to use the herbicide effectively and safely. The label is a legal document. It is YOUR responsibility to use an herbicide correctly, so you must always READ THE LABEL!
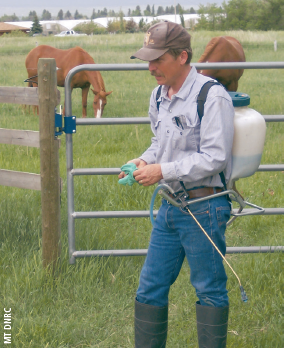
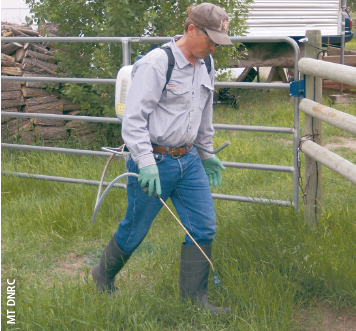
The presence of grazing animals will influence the type of herbicide you select. READ THE LABEL! Photo credit: MT DNRC.
Herbicide labels can be difficult to read. If you have trouble understanding a label or selecting the correct herbicide, contact your local Extension office, county weed coordinator, Montana Department of Agriculture, or the product manufacturer.
HERBICIDE SELECTION

Once you know what is growing on your property, you can select the appropriate herbicide for treatment. Photo credit: MT DNRC
Choosing the correct herbicide to control weeds on your property while protecting desirable plants and the environment is very important. Remember, most herbicides control only specific weeds, so you must first know what is growing on your property.
There are two general categories of herbicides; non-selective and selective. Non-selective herbicides are toxic to ALL plants that come in contact with the herbicide. A commonly used non-selective herbicide is glyphosate (Roundup®).
Selective herbicides are those that kill either grasses or broad-leaved plants. Most of the weeds on the Montana noxious weed list are broad-leaved plants. Selective herbicides will control certain broad-leaved plants and typically not harm desirable grasses when applied at recommended rates. Remember, though, that even herbicides specific for broad-leaved plants can cause injury to desirable grasses if not applied according to label directions. And, broad-leaved herbicides can injure desired broad-leaved plants in addition to weeds.
The herbicide label contains important information such as active ingredients, where herbicide can be applied, and weeds that the herbicide will control. The label is a legal document that you are required to follow. For advice on herbicide selection, please contact your local county Extension agent or weed district coordinator for assistance. To find contact information for your county Extension agent or weed coordinator, visit: www.mtweed.org.
For more information about selecting herbicides, visit:
Weed Control in Natural Areas in the Western United States. http://techlinenews.com/articles/ucdaviscontrolhandbook
WHERE AND WHEN TO APPLY HERBICIDES
It is important to protect yourself and the environment when applying herbicides. The environmental conditions and location where weeds are growing on your property will influence the type of herbicide you use and will help to determine if herbicides are an appropriate tool. Some herbicides cannot be applied next to streams or rivers where the groundwater is near the soil surface, or on certain sites such as cropland, lawns (turf), or rangeland.
READ AND FOLLOW THE LABEL to be sure to apply the herbicide only in approved areas.
The presence of grazing animals will also influence which herbicide you select. The label will tell you if grazing is restricted during or following herbicide application. Remember that some herbicides can pass through an animal after it eats treated forage. These herbicide residues may be present in the manure of the animal, and if the manure is used to fertilize plants in gardens or flower beds, damage may occur. Herbicide residues may also be present on desirable plants (such as grass) that has been sprayed. Do not add clippings from sprayed plants to compost. Injury to desirable plants can also occur if herbicide spray or vapor drifts during the application. Apply herbicides when winds are less than six miles per hour (e.g. when a light flag is weakly extended).
Temperature, moisture, and humidity influence herbicide effectiveness. In general, the best temperatures to apply herbicides are between 65° and 85°F. Hot, dry conditions can increase the thickness of the plant leaf surface and slow plant metabolism, making plants less susceptible to herbicides. High temperatures can also cause herbicides to volatilize, thus reducing effectiveness and increasing the risk of drift to non-target areas. Rain following application of herbicides can affect how well the herbicide will control the weed. If rain is in the short-term forecast, check the herbicide label for the “rainfast” period, which is the required length of time between application and rainfall.
For the best control, apply herbicides when the weed is at the proper growth stage. Most weeds in Montana can be controlled in mid- to late-spring or early summer before the weeds flower and again in the fall. Plants are most sensitive to herbicide applications when they are actively growing.
MIXING AND HANDLING HERBICIDES
Be sure weather and plant growing conditions are suitable for spraying before mixing so spray solution can be used immediately.
Mix away from water bodies, wellheads, food, animal feed, and high traffic areas; preferably on an impervious surface (place sprayer in large tub or bin to contain spills). Follow all label directions for mixing and applying herbicides.
Do not place the end of the garden hose into the spray solution while filling your sprayer. Hold the hose clear of the tank to prevent herbicide from siphoning back into the hose.
Mix only the amount of herbicide you need. It is better to mix one gallon of spray solution, apply that amount, and mix more if necessary.
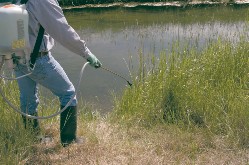
NEVER mix or spray herbicides near water bodies, wellheads, food, animal feed or high traffic areas. Photo credit: MT DNRC
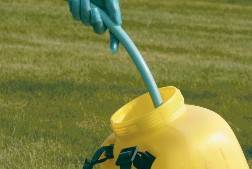
NEVER place the end of your garden hose into the spray solution while filling the sprayer. Photo credit: MT DNRC
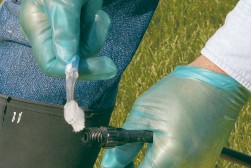
NEVER clean nozzles with a metal object. Instead, use a soft-bristled brush. Photo credit: MT DNRC
- Do not mix an herbicide with another herbicide or chemical unless the combination is listed on the label.
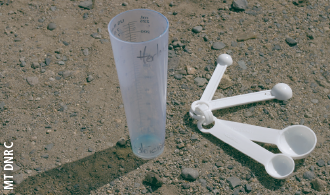
- For most liquid herbicides, fill sprayer with half the water you need, add the proper amount of herbicide and other additives (surfactants or dye), then add the remaining water.
- For most dry herbicides, mix dry material in a smaller container with water and vigorously shake the container until the herbicide is dissolved, then pour this solution into your spray tank as described above for liquid herbicides.
- Rinse your measuring container (spoon or cup) in clean water and add this solution to the tank mixture.
If a spill occurs, follow label directions for containment and cleaning.
For more information about how to calculate dry herbicide formulations, visit:
- techlinenews.com/articles/2013/1/25/herbicide-sprayer-calibration-guidelines
For more information about calibration visit:
- Weed Calibration: Importance of Calibration www.youtube.com/watch?v=9PtFu7vN1eg
Always follow the label to mix your herbicides. Photo credits: MT DNRC
Amount of herbicide to add to sprayer, based on recommended herbicide rate (from label) and volume of water dispensed by sprayer (from calibration steps, page 15)
| Volume Sprayed GPA | Recommended Herbicide Rate/Acre | ||||
| 5 fl oz/acre | 7 fl oz/acre | 1 pint/acre | 1 quart/acre | 2 quarts/acre | |
| 20 | 7.5 cc/gal | 10.5 cc/gal | 5 tsp/gal | 10 tsp/gal | 3 ¼ fl oz/gal |
| 30 | 5 cc/gal | 7.0 cc/gal | 3 tsp/gal | 6 tsp/gal | 2 fl oz/gal |
| 40 | 3.8 cc/gal | 5.3 cc/gal | 2 ? tsp/gal | 4 ¾ tsp/gal | 1 ? fl oz/gal |
| 50 | 3.0 cc/gal | 4.2 cc/gal | 2 tsp/gal | 3 ¾ tsp/gal | 1 ¼ fl oz/gal |
| 60 | 2.5 cc/gal | 3.5 cc/gal | 1 ? tsp/gal | 3 ¼ tsp/gal | 6 ? tsp/gal |
| 70 | 2.1 cc/gal | 3.0 cc/gal | 1 ? tsp/gal | 2 ¾ tsp/gal | 5 ½ tsp/gal |
| 80 | 1.9 cc/gal | 2.6 cc/gal | 1 ¼ tsp/gal | 2 ? tsp/gal | 4 ¾ tsp/gal |
| 90 | 1.7 cc/gal | 2.3 cc/gal | 1 tsp/gal | 2 tsp/gal | 4 ¼ tsp/gal |
| 100 | 1.5 cc/gal | 2.1 cc/gal | 1 tsp/gal | 2 tsp/gal | 3 ¾ tsp/gal |
Equipment and Pre-Calibration: www.youtube.com/watch?v=LJw_LtJJ6CA
Understanding Calibration www.youtube.com/watch?v=DsOH1BihwWM
Calibrating a Backpack Sprayer & Hand Line www.youtube.com/watch?v=ya89f627R14
Using the Strip Method www.youtube.com/watch?v=BRsvbBwa_M
ATV boom sprayer calibration www.youtube.comwatch?v=fW6g0uq8byo
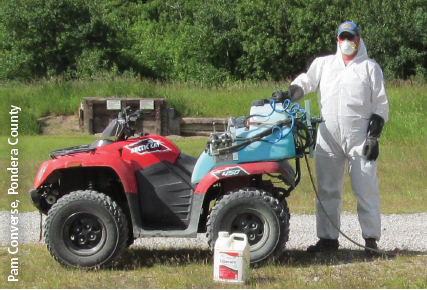
Personal Protective Equipment (PPE) consists of rubber gloves, long-sleeve shirt, long pants, boots, and eye protection. Photo credit: Pam Converse, Pondera County
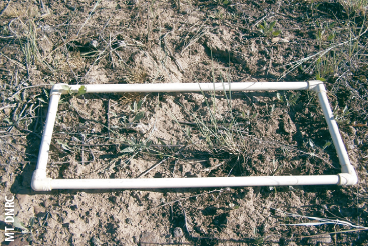
SPRAYER CALIBRATION
Calibrating your sprayer before you mix and apply herbicides is very important. A properly calibrated sprayer will ensure the herbicide is being applied at the correct rate, thereby saving you money, protecting the environment, and resulting in the most effective weed control. This section explains how to calibrate a backpack sprayer. If you want to calibrate other types of spray equipment such as broadcast, ATV-mounted, or boom-type sprayers, contact your local Extension agent or county weed coordinator.
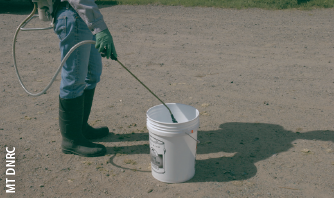
The following method of calibrating a backpack sprayer involves very little math or formulas. It is based on the principle that 1 gallon equals 128 ounces and the area you will spray for calibration is 1⁄128 of an acre. Thus, ounces collected equals gallons per acre. Calibrate your sprayer using clean water only. (DO NOT add herbicide.)
Step 1: Examine your sprayer carefully, checking for and repairing any leaks or cracks; clean or replace nozzles, as necessary. Clean nozzles with a soft-bristled brush such as a toothbrush, never with a metal object.
Step 2: Measure an area 18.5 by 18.5 foot (1⁄128 acre). This should be done on terrain similar to where you will be spraying.
Step 3: Time and record how long it takes you to spray the measured area uniformly with water using a gentle side-to-side sweeping motion with the spray wand. Maintain a constant sprayer pressure during application. REPEAT THIS STEP AT LEAST TWO TIMES AND CALCULATE THE AVERAGE TIME.

Sprayer calibration is essential to make sure that you are applying the correct amount of herbicide. Photo credits: MT DNRC
Step 4: Spray water into a container for the same amount of time it took you to spray the measured area in Step 3. Again, maintain constant sprayer pressure while you spray into the container.
Step 5: Measure the number of ounces of water in the container. The number of ounces collected in the container equals the number of gallons of water/acre the sprayer is delivering.
Step 6: Use the table on page 14 to determine how much liquid herbicide to add to EACH gallon of water. Find your spray volume in gallons per acre (GPA – calculated in Step 5) and read across the chart to determine the amount of herbicide to add to each gallon of water based on the recommended herbicide application rate.
EXAMPLE: You calibrate your sprayer and the output is 30 GPA (see Step 5). The herbicide label recommends an application rate of 1 pint/acre for the target weed. Go to the table on page 14 and read across from 30 GPA – the amount of herbicide to add to each gallon of water is 3 teaspoons. If your backpack sprayer holds 3 gallons, you would add 9 teaspoons of herbicide. Proper calibration is vital to the success of your management goals and you need to make sure that you are not applying too much or too little herbicide. If you are unsure about how to calibrate your sprayer, seek help from the local Extension agent or county weed coordinator. To find contact information for your local Extension agent or weed coordinator visit: www.mtweed.org
You can add agricultural dyes to your spray solution. The dye will color the spray so you can see treated areas. Photo credit: Shantell Martin, MNWEC
BOTTOM RIGHT: Some herbicides act very quickly on a plant, while others take more time; in some cases, it may take two to four weeks before you see any changes in plant vigor. Photo credit: Jane Mangold, MSU
Once you have calibrated your sprayer, you are ready to mix your herbicide solution. Always READ AND FOLLOW THE LABEL to determine what personal protective equipment (PPE) should be worn, how much herbicide to prepare, and the mixing procedure. Remember that when you are preparing an herbicide solution, you are working with the herbicide in its most concentrated form. Some herbicides require the addition of a surfactant for the herbicide to control the target weed. A surfactant allows the herbicide solution to more easily penetrate the leaf surface of plants. If a surfactant is recommended, add one tablespoon of surfactant to each gallon of spray solution. Surfactants can be purchased at the same location as herbicides.
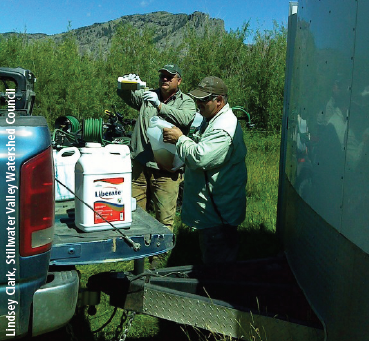
Always follow the label to mix your herbicides. Photo credit: Lindsey Clark, Stillwater Valley Watershed Council
The following basic precautions should be followed when mixing an herbicide:
DOs
- Wear label-recommended personal protective equipment (PPE), e.g. rubber gloves, long pants and long-sleeved shirt
- Wear eye protection
- Wash hands before touching food, drink, or skin
- Wash your clothing and yourself thoroughly within two minutes if a spill or splash occurs
DON’Ts
- Wear shorts, tank tops, open-toed shoes
- Pour herbicides at eye level
- Smoke, drink, eat, or go to the bathroom without washing hands first
For more information about mixing visit: Adding Pesticide to Your Tank www.youtube.com/watch?v=e13L9Y4BNl8
APPLYING THE HERBICIDE
Before applying herbicides be sure to calibrate your sprayer so that you add the correct amount of herbicide to your spray tank. Once your spray is mixed and ready to apply, follow these basic guidelines for best results:
- Carefully examine the area you are spraying so that you do not inadvertently spray desirable plants or contaminate water.
- Mix away from water bodies, wellheads, food, animal feed, and high traffic areas.
- Do not apply herbicides near water, such as streams or shallow groundwater areas, unless approved on the label.
- Do not apply under sensitive shrub or tree species or allow herbicide to drift onto desirable plants (some herbicides can be safely applied under trees and shrubs; READ THE LABEL).
- Apply during appropriate environmental conditions (calm winds, no rain, mild temperatures, moderate humidity).
If you chose not to apply herbicides yourself, professional commercial applicators are available. Contact your local Extension agent or county weed coordinator for a list of applicators in your area.
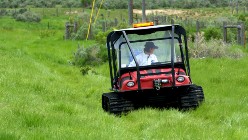
A person in an all terrain utility vehicle applying herbicide. Photo credit: Brian Ostwald, Carbon County
If you choose not to apply herbicides yourself, professional commercial applicators are available. Contact your local Extension agent or county weed coordinator for a list of herbicide applicators. When hiring a commercial applicator, ask for and review his/her current insurance, license, and references. If the applicator is not licensed and insured, do not hire him/her.
EXPECTED OUTCOMES AFTER APPLICATION
Mid-summer herbicide applications may not affect the stature or appearance of the weed because the plant is under summer dormancy and not actively growing. If you spray during mid-summer, you can still control some weeds, but control may be reduced depending on the weed and herbicide used. Herbicides are usually effective when applied to weeds in the fall if you have adequate moisture and some green growth near the base of the plant. Some herbicides act very quickly on the plant, while others take more time; in some cases, it may take two to four weeks before you seeany change in plant vigor. Usually weeds will curl and twist, and start to turn reddish-brown and/or become yellow at the growing points.
CLEAN-UP AND DISPOSAL
After spraying, clean equipment and clothing to remove herbicide residues.
- Add clean rinse water to your sprayer and spray it on your application site.
- Triple-rinse empty herbicide containers at the mixing site and puncture the container before disposal.
- Do not rinse equipment or empty herbicide con- tainers near a wellhead or other sensitive areas.
- Wash clothing you wore while spraying separately from other clothing with heavy- duty liquid detergent and hot water. Do not use bleach. Line dry clothing where it will be exposed to sunlight, if possible. Shower using soap and warm water and wash your hair.
Herbicide choice, calibration and application can be quite daunting. For assistance contact your local Extension agent or county weed coordinator. To find contact information, visit: www.mtweed.org.
Photo credit: MT DNRC
A backpack sprayer for spot spraying weeds may be the most versatile type of sprayer to use on small acreages as it can be used on rough groun