

4-H Cloverbud Activity Book A
The Cloverbud Activity Book is designed to introduce Cloverbuds to many different 4-H areas. The booklets provide activities in Animal Sciences/Animal Life, Expressive Arts, Family, Home, Health, Science and Natural Resources. The record sheet is included in the project book.
Last Updated: 01/10by Kim Drolshagen, Michelle Grimm and Michelle Schroeder
This resource, 4-H Cloverbud Activity Book A, is available from Taylor County Extension, University of Wisconsin-Madison, and used here with permission.
View the source PDF version for the 4-H Cloverbud Activity Book A at Extension Taylor County website
PAGE 1
Produced by: Kim Drolshagen, Michelle Grimm and Michelle Schroeder, 2010
“An EEO/Affirmative Action employer, University of Wisconsin-Extension provides equal opportunities in employment and programming, including Title IX and ADA. Please make requests for reasonable accommodations to ensure equal access to educational programs as early as possible preceding the scheduled program, service, or activity. This document can be provided in an alternative formation by calling UW-Extension at 715/748-3327 or 711 for Wisconsin Relay.”
PAGE 2

Table of Contents
- My 4-H Club p. 3
- A Little Bit About Me p. 4
- About 4-H p. 5
- 4-H Pledge p. 6
- My Club and County Activities & Events p. 7
- Create-A-Critter p. 8
- Ant ANTatomy p. 9
- Create a Habitat p. 10
- Let’s Make Sidewalk Chalk p. 11
- Puppet Creations p. 12
- Sand Painting p. 13
- Beanbag Socks p. 14
- Graham Cracker Scram p. 15
- Kitchen Safety p. 16
- First Aid p. 17
- Let’s Learn About Sound! p. 18
- Make a Constellation p. 19
- Examples of Constellations p. 20
- Sink or Float? P. 21
- All About Leaves p. 22
- Leaf Identification Guide p. 23
- Let’s Grow Vegetables! P. 24
- Measuring Rain p. 25
- References p. 26
PAGE 3
My 4-H Club
My Name: _________________________________________________________
4-H Club Name: _________________________________________________________
4-H Leader’s Name: ________________________________________________________
Phone Number: _________________________________________________________
Other Club Members: ______________________________________________________
__________________________________________________________________________________________________________
4-H Youth Development Agent’s Name:________________________________________________________________
Phone Number: ______________________________________________________________
PAGE 4
A Little Bit About Me
Name: _________________________
Age: __________________________________________
My Family members: _________
My favorite activities: ___________
_____________________________________________________________
______________________________________________________________
PAGE 5
4-H Club Emblem
The four leaf clover with the letter “H” on each leaf, which stands for head, heart, hands and health. The colors of the emblem are green and white.
4-H Motto
“TO MAKE THE BEST BETTER”
This motto challenges everyone involved in 4-H to do the very best job they can.
4-H Slogan
“LEARN BY DOING”
PAGE 6
4-H Pledge
I pledge:
My Head to Clearer Thinking (Right hand points to forehead)

My Heart to Greater Loyalty (Right hand over heart)
My Hands to Larger Service (Arms slightly bent, palms up)

And My Health to Better Living for My Club, My Community, My Country and My World (Arms at side)

PAGE 7
My Club and County Activities and Events
Activities and events I was part of:
| Event | Date |
PAGE 8 - Animal Sciences and Animal Life
Create - a - Critter
Make up a brand new critter. Construct your critter by using some of the materials listed below, and then draw a picture of your creation. Decide the details by completing the sentences below.

My critter’s name is ____________________________________________________________.
It lives in the____________________________________________________________________ .
It eats ___________________________________________________________________________.
It moves by _____________________________________________________________________.
It is special because it __________________________________________________________.
Materials: straws, toothpicks, paper, paper plates, modeling clay, crayons, anyother items you may have
PAGE 9 - Animal Sciences and Animal Life
Ant ANTatomy
Create your own ANT! 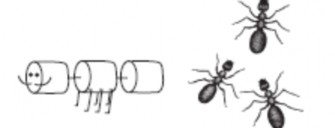
Ants are a type of insect that have six legs, two antennae and three body sections. The three body sections are the head, thorax and abdomen.
Ants live in colonies made up of queens, males and workers. They are amazing creatures that come in different colors, with black being the most common. Ants can carry up to 27 times their body weight!
Where do you see ants?_________________________________________________________________________________
What color ants have you seen before?_________________________________________________________________
How many antennae do ants have? ______________________________________________________________
Can you name the three body sections of an ant? ________________________________________
How many legs do ants have? ____________________________________________________________________
Time to make your ant! 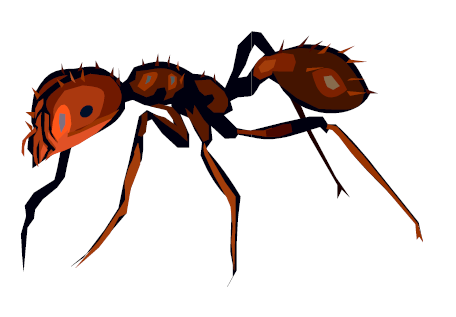
Materials:
- three large marshmallows
- 4 large pipe cleaners cut in half
- 2 toothpicks
- scissors
- markers.
Procedure:
- Use the three large marshmallows as the body sections and connect them using toothpicks.
- Cut 4 large pipe cleaners in half to make 8 small pipe cleaners.Use 6 for the legs and insert 2 for the antennae.
- Decorate your ant using markers.
PAGE 10 - Animal Sciences and Animal Life
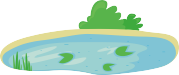
Create a Habitat

Choose an animal and create its habitat!
For this activity, choose any animal and look up its habitat. An animal’s habitat is the area in which it lives. For example, your habitat is your house because it is where you live.
You can make your habitat out of anything you would like. A few suggestions are: shoebox, construction paper, glue, markers, grass and twigs.
My animal is a __________________________________________________________________________.
It lives _____________________________________________________________________________________ .
It eats _________________________________________________ .
PAGE 11 - Expressive Arts
Let's Make Sidewalk Chalk

Materials:
- 2 cups water
- 2 cups Plaster of Paris
- 2 Tablespoons Tempera Paint (wet or dry)
- Toilet paper tubes with duct tape over one end
- Cookie sheet lined with aluminum foil or waxed paper
Procedure:
- Combine and stir together all ingredients, and let stand for a few minutes.
- Place prepared toilet paper tubes on cookie sheet lined with aluminum foil or waxed paper.
- Pour mixture into holders, let stand until semi-firm.
- Remove holders and let dry completely.
- Ready to use in 1 ½ hours.
- Now use your sidewalk chalk to draw a picture outside!
CAUTION: DO NOT POUR PLASTER DOWN THE DRAIN AND MAKE SURE ADULTS SUPERVISE THE MIXING!
PAGE 12 - Expressive Arts
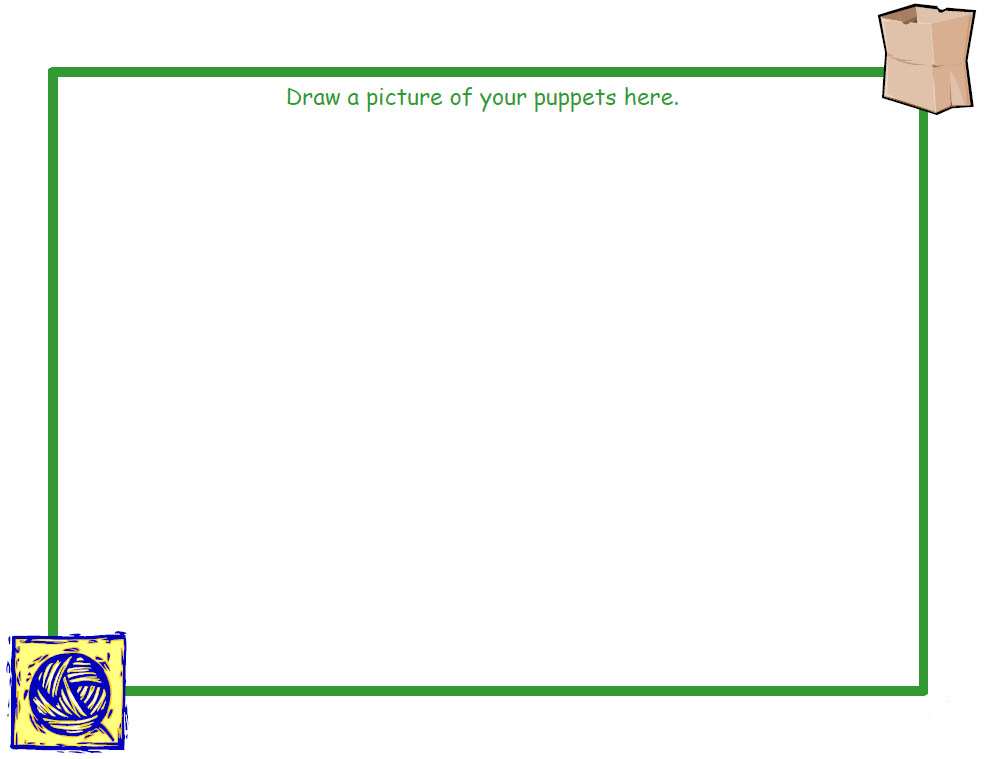
Puppet Creations
Let’s create a puppet and perform a puppet show!
Materials:
- Lunch bag
- Markers
- Googly Eyes
- Yarn
- Glue
- Pipe Cleaners
- Other Craft Supplies
Procedure:
Using your supplies create puppets and perform a show for your friends and family!
PAGE 13 - Expressive Arts
Sand Painting
Let’s create a picture using sand! 
Materials:
- Dry Sand (in paper cups)
- Pencil
- Crayons
- White Glue
- Paper or Cardboard
- Newspapers
Procedure:
- Use a pencil to draw a picture design lightly on paper.
- Apply a bead of glue to the pencil lines.
- Sprinkle sand gently over the wet glue.
- Tile the paper so the extra sand falls off the paper onto the newspaper.
- Let dry.
- Use crayons to add details or color to the sand painting.
PAGE 14 - Family, Home and Health
Beanbag Socks
Practice some sewing skills while making a beanbag sock!
Materials: 
- Unmatched Sock
- Dried Beans
- Large Darning Needle
- Colorful Yarn
- Scissors
- Markers
Procedure:
- Collect the materials needed.
- Fill sock with dried beans, leaving room to sew the top of the sock.
- To finish the sock – close to the beans stitch the top closed using the colorful yarn and darning needle.
- Use markers to decorate the sock.
See if you can come up with a fun game to play with your new beanbag sock!

PAGE 15 - Family, Home and Health
Graham Cracker Scram
Let’s Make a Delicious and Nutritious Snack!
Make sure to ask an adult for help!
Ingredients:
- Graham Crackers
- Peanut Butter
- Bananas, sliced
- Low-fat milk
Equipment:
- Plastic Knife
- Paper Plates
- Plastic Glasses, for milk

- Napkins
Procedure:
- Before making the snack, make sure to wash your hands with soap and warm water.
- Use the plastic knife to slice the bananas.
- Take a half of a graham cracker and spread peanut butter on it and then top the peanut butter with sliced bananas. Add the other half of the graham cracker to the top and enjoy with a glass of low-fat milk.
This snack is made with everyday foods that are healthy for us, like peanut butter and fruit. Can you think of any other everyday foods you could use to make a similar snack?
Recipe adapted from Kitchen Science for Kids, Cornell University Cooperative Extension, 1995 and Kangaroo Jump 5: Power Up the Day, Michigan State University Extension
PAGE 16 - Family, Home and Health
Kitchen Safety
Circle all of the unsafe things in this picture.
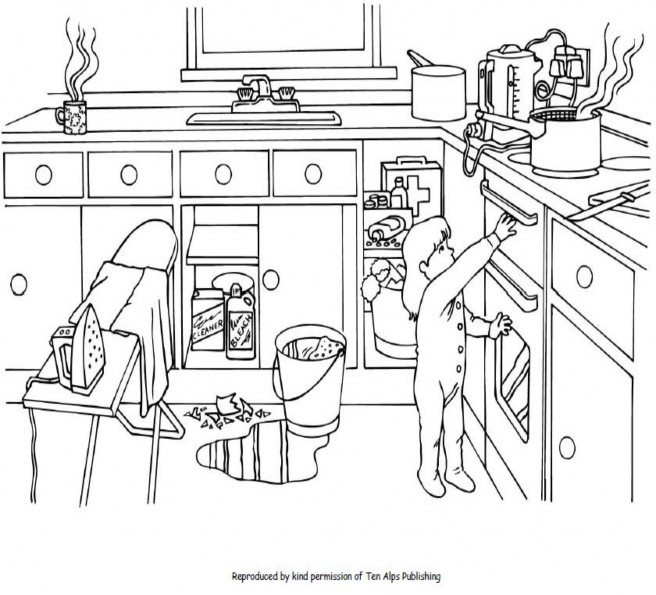
Do you have any of these habits in your kitchen? __________________________________________________
List the things you will change about your own safety habits. __________________________________________________
___________________________________________________________________________________________________________________
PAGE 17 - Family, Home and Health
First Aid
Examine the items you find in a first aid kit, and write what they are used for.
Bandages

__________________________________________________________________________________
__________________________________________________________________________________
___________________________________________________________________________________
Sterile Gauze

__________________________________________________________________________________
__________________________________________________________________________________
___________________________________________________________________________________
Adhesive Tape

__________________________________________________________________________________
__________________________________________________________________________________
___________________________________________________________________________________
Antiseptic Wipes
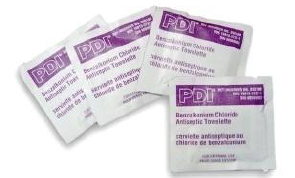
__________________________________________________________________________________
__________________________________________________________________________________
___________________________________________________________________________________
Antibiotic Ointment
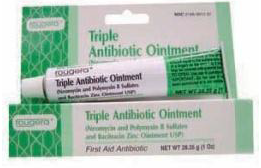
__________________________________________________________________________________
__________________________________________________________________________________
___________________________________________________________________________________
Sterile Gloves
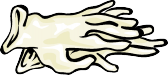
__________________________________________________________________________________
__________________________________________________________________________________
___________________________________________________________________________________
Now, let’s make a First Aid Kit!
Ask an adult to help gather the materials listed above. Find an old coffee can, plastic zip-lock bag, old lunch box, plastic container or anything that can help hold your first aid supplies. Keep your first aid kit in a safe place you can easily get to.
PAGE 18 - Science
Let's Learn About Sound!

Sound is a vibration moving through air, water, or some other material. Our ear collects these vibrations and turns them into a signal which is sent to our brain.
Let’s Make Some Noise!
Build a Kazoo
Materials:
- Toilet Paper Tube
- Waxed Paper
- Rubber Band
- Crayons
- Scissors
Procedure:
- Cut a square of waxed paper to cover the toilet paper tube.
- Secure the waxed paper to the end of the toilet papertube using a rubber band.
- Decorate your kazoo using crayons.
- Practice humming without your kazoo.
- Now try to hum using your kazoo.
Does your humming noise sound different when your use a kazoo? ________________________________________
What is vibrating on your kazoo? ____________________________________________________________________
Do you think that changing the length of the kazoo will change the sound? _________________
Try it!
PAGE 19 - Science
Make a Constellation
Constellations are pictures made up of stars. They were often named after items people were familiar with like animals or mythical people.

Constructing a Constellation
Materials:
- 8 ½ “ x 11” White Paper
- 8 ½ “ x 11” Black Construction Paper
- Pencil
- Metal Pin
- Stars Cutouts
 Scissors
- Glue
- White Crayon
Procedure:
- Draw a picture of your constellation on the white paper. You may draw a constellation from one listed on the next page or create your own.
- Line up your white and black papers. Using the metal pin, poke a hole through every corner of your design.
- Cut out stars and glue one on every pin hole.

- Connect the stars using a white crayon.
Star Cutout Pattern: 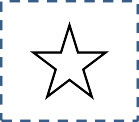
Adapted from: Mini 4-H Space. By: Roylene Laswell. Purdue University Extension Service.
PAGE 20 - Science
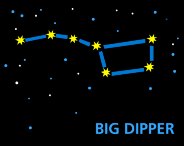
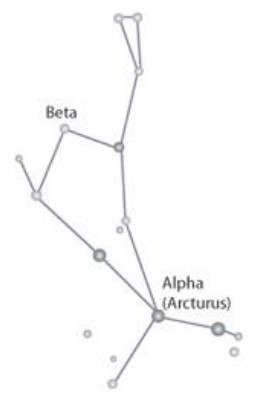
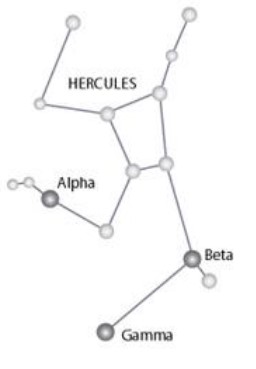
Examples of Constellations

|
Big Dipper - All Year |
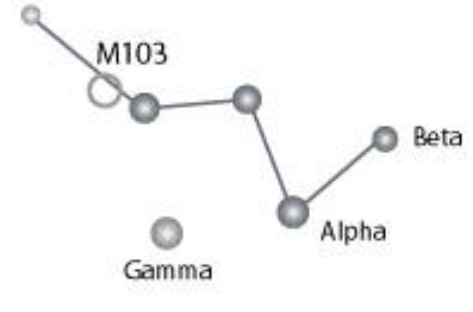 Cassiopeia - All Year |
|
Boötes - Winter |
Taurus - Winter |
|
Hercules - Summer |
Leo - Summer |


PAGE 21 - Science
Sink or Float? 
Does it float? Try different objects and record if they sink or float.

Materials:
- Sponge
 Paper Clip
- Toothpick
- Marble
- Plastic Spoon
- Penny
- Plastic Straw
- Crayon
- Plastic Dishpan or Bucket, filled with water
- Towel
- Piece of Paper
- Pencil

Procedure:
- Divide your piece of paper into two. On one side write FLOAT and on the other write SINK.
- Make predictions of which objects you think will sink and which will float.
- Time for testing! With the container filled with water, place each object in it one at a time and record whether the object floats or sinks.
Which items did you guess correctly? _________________________________________________
Why do you think some items sink and some float? _______________________________________________
PAGE 22 - Natural Resources

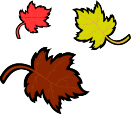
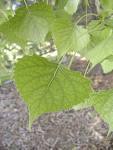
All About Leaves
Let’s collect, identify and preserve leaves!
Materials:
- Roll of Wax Paper
- Fresh Fall Leaves
- Plain, Scrap Paper
- Iron for Pressing
- 9 x 12” Construction Paper
- Stapler
- Permanent Marker for Labeling Leaves
- Tree Field Guide
Procedure:
- Take a nature walk and collect some fall leaves.
- Using a tree field guide identify each leaf.
- Press the leaves by layering them between plain paper. Repeat layers until all leaves are placed. Make a paper-and-leaf sandwich and place a heavy book on top. After a couple of days carefully remove the pressed leaves.
- Cut a piece of waxed paper 2 feet long. Lay out the pressed leaves on the waxed paper in any pattern, but make sure to leave a 1 inch border on the long sides and a 2 inch border at each end.
- Have an adult help you lay the waxed paper design on an ironing board. Place another layer of waxed paper on top of your design. Working gently and quickly use the iron to press the wax layers together. You will only need a second or two for the wax to adhere.
- Use the construction paper to make a border around your waxed paper and adhere it using a stapler.
- Have an adult help hang your artwork in a window!
PAGE 23 - Natural Resources
Leaf Identification Guide
 Maple |
Oak |
 Birch |
 Ash |
 Poplar |
|
Black Walnut |
 Hickory |
 Sycamore |
Basswood |
 Cottonwood |


These are just a few types of leaves, please use a Tree Identification Guide for more information.
PAGE 14 - Natural Resources
Let’s Grow Vegetables!
Let’s identify seeds using a handy seed chart.
Materials:
- White Paper
- Plate
- Ruler
- Glue
- Markers
- 8 Kinds of Seeds (Example: Bean, Pea, Spinach, Corn, Radish, and Cucumber)
Procedure:
- Divide the paper plate into eighths, like a pie. First divide the plate in half, then in fourths, followed by eighths. Draw lines using a marker and a ruler.
- In each segment, glue a seed, label it, and draw a picture of the vegetable.
It’s now time to plant some seeds!

Materials:
- Seeds (leftover from the handy seed chart)
- Potting Soil
- Paper Egg Carton
- Water
Procedure:
- Remove the lid from the egg carton and fill each section about¾ full with potting soil.
- Place the seeds in the soil according to the package directions.
- Place the egg carton in a location of natural light and water the seeds regularly.
- Watch your garden grow! As the seedlings get larger, transplant them into your garden or larger pots by cutting the egg carton segment and planting the whole part in the ground.


PAGE 25 - Natural Resources
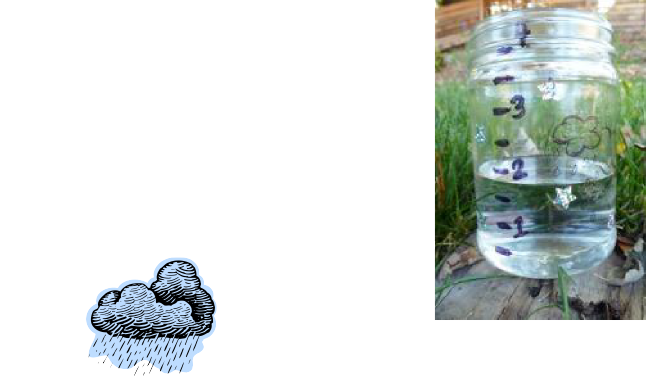
Measuring Rain
Rain is a type of precipitation that is often measured using a rain gauge. Let’s make a rain gauge!

Materials:
- Glass Jar
- Permanent Marker
- Ruler
- Stickers
- Paint
Procedure:
- Place a ruler along a glass jar and mark every ½ inch using a permanent marker. Make sure to label the marks.
- Decorate your rain gauge using stickers or paints however you would like.
- Place rain gauge outside in a flat open area. Make sure to empty the jar after each rain.
Observations:
How much rain was in your rain gauge after a storm? __________________________________
What other types of precipitation are there? _____________________________________

PAGE 26
References
- http://www.education.com/activity/
- A great website for activity ideas.
- 4-H Mini Space. 4-H-911-6. By: Roylene Laswell. Purdue University Extension Service. http://www.extension.purdue.edu/extmedia/4H/4H-911-6.pdf
- Cloverbuds Activities Packet. By: Richard Moreland and Lori K. Hutchins. University of Minnesota Extension Service.
- Cloverbud Program Manual. Montana 4-H. http://www.montana4h.org/#project:53.
- Environmental Science/Plants & Animals Activity Guide
- Science and Technology Activity Guide
PAGE 27
4-H Members,
We have compiled new project material for 4-H Cloverbuds. The material will now be on a three year rotation, with 4-H Activity Book A, B, and C. Each year, all Cloverbuds will be doing projects out of the same activity book.
The Cloverbud Activity Book is designed to introduce Cloverbuds to many different 4-H areas. The new booklets provide activities in Animal Sciences/Animal Life, Expressive Arts, Family, Home, and Health, Science, and Natural Resources.
Please give feedback about the new 4-H Cloverbud Activity Book and return it to the UW Extension Office.
Sincerely,
Michelle Grimm
Taylor County 4-H Youth Development Agent

Comments about the new 4-H Cloverbud Activity Book:
_
_
_
_
_
_
_